Saving your Photos
Once you are done editing your photo you can save it to your computer. If you just want to save the photo press on the save button and select the place where your want to put your edited photo.
![]() The editor will choose a default name for your file. If you decide to change it make sure you keep the file extension. Some operating systems may not recognize your photo if you save it without an extension. (that is the .jpg and .png at the end of the file name )
The editor will choose a default name for your file. If you decide to change it make sure you keep the file extension. Some operating systems may not recognize your photo if you save it without an extension. (that is the .jpg and .png at the end of the file name )
lossy or not lossy?
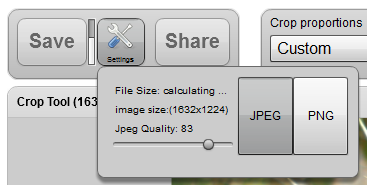
Right next to the save button there is a settings button. If you press it this panel pops up:

There are two options to save your file, either JPEG or PNG. What’s the difference?
A JPEG photo is also called a lossy file format. It’s ‘lossy’ because the photo when saved doesn’t look exactly as the original and some quality is lost in the process. There is a benefit however, and that is that the file size will be smaller than the original, sometimes is much smaller, and is difficult to tell at the naked eye some quality was lost, therefore JPEG is usually the preferred option in most situations. You can choose the quality and the file size with the editor. Read further down.
A PNG photo is a lossless file format. No information is lost when you save your photo but the file sizes will be higher. What option you choose depends on your needs. Here is a guideline:
choose JPEG for:
- natural looking images. Landscapes, vacation photos, faces, animals
- images prepared for sending them through the internet
choose PNG when:
- Size is not a concern, you want the best quality and a photo without quality loss
- photo is a synthetic image from a computer. JPEG severely degrades images that were created in a computer and have hard edges. PNG is usually a better format for them.
Selecting File Size and Quality
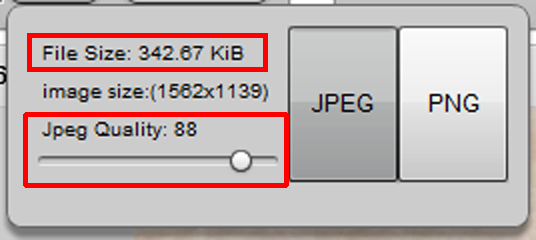
If you choose to save your photos as JPEG you’ll be able to choose the file size of the photo, or what is the same, what quality you want your saved photo to have.
If you inspect the settings window you will see an slider that says ‘quality’. When you move the slider right or left will trigger the editor to start calculating how big the final file will be. You will see that the file size indicator changes to ‘calculating’. After a little bit, the final size will come up. You can interactively drag the slider until you achieve the desired size. Once you are there, simply press save and you will be done.

Back to:Photo Editor Overview Photo Editor


